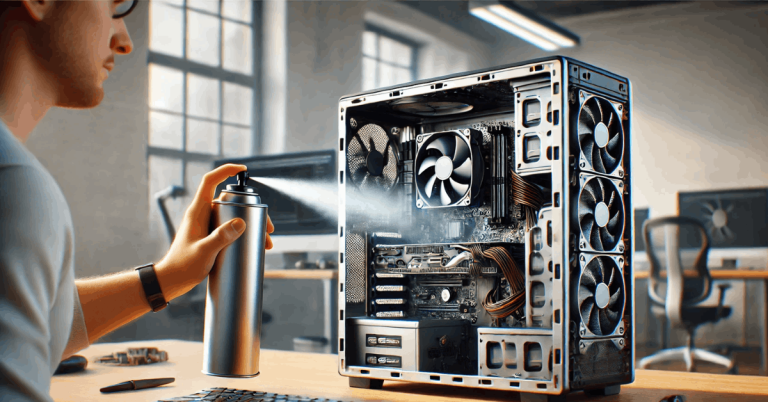
Installing RAM (Random Access Memory) is an effective way to improve a computer’s performance globally.
This guide focuses on upgrading desktops or laptops to enhance system speed and multitasking. Follow these steps for safe and accurate RAM installation.
How to Identify Faulty RAM
To troubleshoot RAM problems, follow these steps:
- Reseat the RAM: Remove the RAM module and firmly reinstall it in the same slot.
- Check Compatibility: Verify that the RAM is compatible with the motherboard and CPU.
- Test the RAM: Use spare RAM modules to test the slot or place the suspected RAM in another compatible system.
These steps will help determine if the issue lies with the RAM module or the RAM slot.
Testing RAM for Issues
Use diagnostic tools to test RAM performance:
Windows Memory Diagnostic:
- Press Win + R to open the Run dialog.
- Type mdsched.exe and press Enter.
- Follow the prompts to restart the computer and scan for issues.
MemTest86: A third-party tool offering a detailed analysis of memory errors that may indicate faulty RAM.
Common Causes of RAM Failure
- Manufacturing Defects: Faults in new modules straight from production.
- Overheating: Persistent high temperatures can degrade RAM.
- Power Surges: Electrical fluctuations may permanently damage modules.
- Aging Hardware: Performance decreases as RAM ages over time.
Diagnosing Faulty RAM
Efficiently identifying faulty RAM minimizes downtime and ensures stable laptop performance. Focus on clear symptoms and reliable tools to confirm issues.
Symptoms of Faulty RAM
Identify faulty RAM by observing these signs:
- Frequent Crashing: Applications or the system repeatedly crash, often due to memory issues.
- Performance Issues: Significant slowdowns during tasks can indicate failing RAM.
- Blue Screen Errors: Random blue screen errors are often linked to memory instability.
- System Reboots: Unexpected restarts may result from unstable RAM.
Diagnostic Tools
Use reliable tools to confirm RAM problems:
- Windows Memory Diagnostic: A built-in feature to test memory for errors. Access it through the Control Panel or by typing “mdsched” in the search bar.
- MemTest86: A comprehensive tool for RAM testing. Download it globally, create a bootable USB drive, and run it to detect faults.
Preparing for RAM Installation
Ensure these items are ready:
- New RAM modules.
- Phillips head screwdriver.
- Anti-static wrist strap (optional but recommended).
- Computer manual.
- Clean and well-lit workspace.
Verifying RAM Compatibility
Confirm these factors to avoid issues:
- RAM Type: Identify the DDR generation supported by the motherboard (DDR3, DDR4, DDR5).
- Capacity: Check the maximum RAM capacity allowed by the motherboard.
- Speed: Confirm the supported RAM speed.
- Form Factor: Use DIMM modules for desktops and SO-DIMM modules for laptops.
Preparing to Replace Faulty RAM
Proper preparation ensures efficient replacement and safeguards data integrity.
Backing Up Data
Data backup is essential to protect important files during RAM replacement. Use external drives or cloud storage for saving documents, photos, and applications. A full system backup simplifies restoration after the repair.
Tools and Materials
Efficient RAM replacement requires:
- Anti-static wrist strap: Prevents static discharge that could damage RAM or other components.
- Phillips-head screwdriver: For unscrewing the RAM compartment or laptop casing.
- Plastic prying tool: Opens laptop casing without causing physical damage.
- Replacement RAM module: Must match laptop specifications.
- Organized workspace: Minimizes misplacement of components or tools.
Repair Process for Faulty RAM
The process of repairing faulty RAM involves accessing, removing, replacing, and testing the RAM module.
Accessing the RAM Module
Locate the laptop’s RAM access panel, typically found on the underside. Use a screwdriver to remove the securing screws. Lift the panel gently to expose the RAM module.
Removing and Replacing RAM
Release the clips on both sides of the RAM module to disengage it. Handle the module carefully by its edges, avoiding contact with the pins. Align the replacement RAM with the slot and press down until the clips lock it securely in place.
Testing the New RAM
Reattach the access panel and power on the laptop. During startup, enter the BIOS setup (using keys like F2 or DEL) to verify the system detects the new RAM.
Use a memory testing tool, such as MemTest86, to confirm the replacement module works properly, ensuring the system operates without errors. This step ensures compatibility and reliability for users worldwide.
Common Mistakes to Avoid When Replacing Faulty RAM
When replacing faulty RAM in laptops worldwide, avoid these common errors to ensure efficient results and optimal device performance:
- Using Incompatible RAM Specifications: Installing RAM modules with incorrect specifications causes incompatibility. Always verify the type, speed, and voltage needed by consulting the laptop manual or the manufacturer’s global support page.
- Ignoring Static Precautions: Failing to discharge static electricity may damage RAM. Use an anti-static wrist strap or touch a grounded metal object to prevent static discharge before handling components.
- Incorrect Installation Technique: Forcing a RAM module into the slot risks damaging the module or the motherboard. Align the module correctly and press gently until it clicks into place.
- Neglecting BIOS or Firmware Updates: Compatibility issues with new RAM may arise if BIOS or firmware updates are skipped. Check the manufacturer’s official website for the latest versions and apply updates as needed.
- Omitting Post-Installation Memory Tests: Skipping memory diagnostics may leave issues undetected. Use tools like Windows Memory Diagnostic or MemTest86 to confirm the new RAM functions properly.
- Mishandling Laptop Components: Improper handling can damage sensitive parts. Hold the RAM module by its edges and avoid touching the contacts or pins to maintain component integrity.
- Disregarding Manufacturer Guidelines: Ignoring manufacturer-provided installation instructions can lead to suboptimal performance. Adhere to the recommendations specified in the device manual.
When to Seek Professional Help for RAM Issues Worldwide
Repairing faulty RAM may not always be practical. Certain signs suggest the need for professional assistance.
Persistent Performance Problems
If performance issues persist after replacing the RAM, deeper hardware issues could be the cause. Certified technicians use diagnostic tools to accurately identify problems affecting RAM functionality.
Boot Failures
A laptop that fails to boot after a RAM replacement might have issues with the motherboard or power supply. Professionals are equipped to identify the exact cause and suggest solutions.
Repeated RAM Failures
Frequent RAM failures may indicate underlying problems in the laptop, such as power irregularities or faulty slots. Experts can conduct thorough diagnostics to resolve systemic issues.
Physical Damage
Visible damage to the RAM slots or motherboard requires specialized repair or replacement. Trained technicians ensure proper handling of these components to restore functionality.
Warranty Considerations
For laptops under warranty, DIY repairs can void coverage. Professional service centers perform repairs that align with warranty terms, safeguarding the investment.
Conclusion
Replacing faulty RAM is manageable with a methodical approach. Identifying symptoms, taking necessary precautions, and avoiding common errors ensure effective repair.
Seek professional help if needed to maintain system performance. Attention to detail extends the lifespan of devices worldwide.


